Maybe some of you will understand this more than others, and that’s ok, because crafters like me can give handmade and we love doing so.
A long while ago, I’m taking before COVID hit! Which is a really long while ago a friend of mine, Sarah, came to my house with bags filled with yarn all sorts of yarn! She told me she wouldn’t use them any more and she thought of me, and I appreciate that thought very much. A lot of the pretty yarns were sparkly ones, from Spotlight in many different colours and different amounts as well.
Having these humongous range gave me the chance of trying a pattern of gloves and they worked fabulously! That’s to come BTW 😬
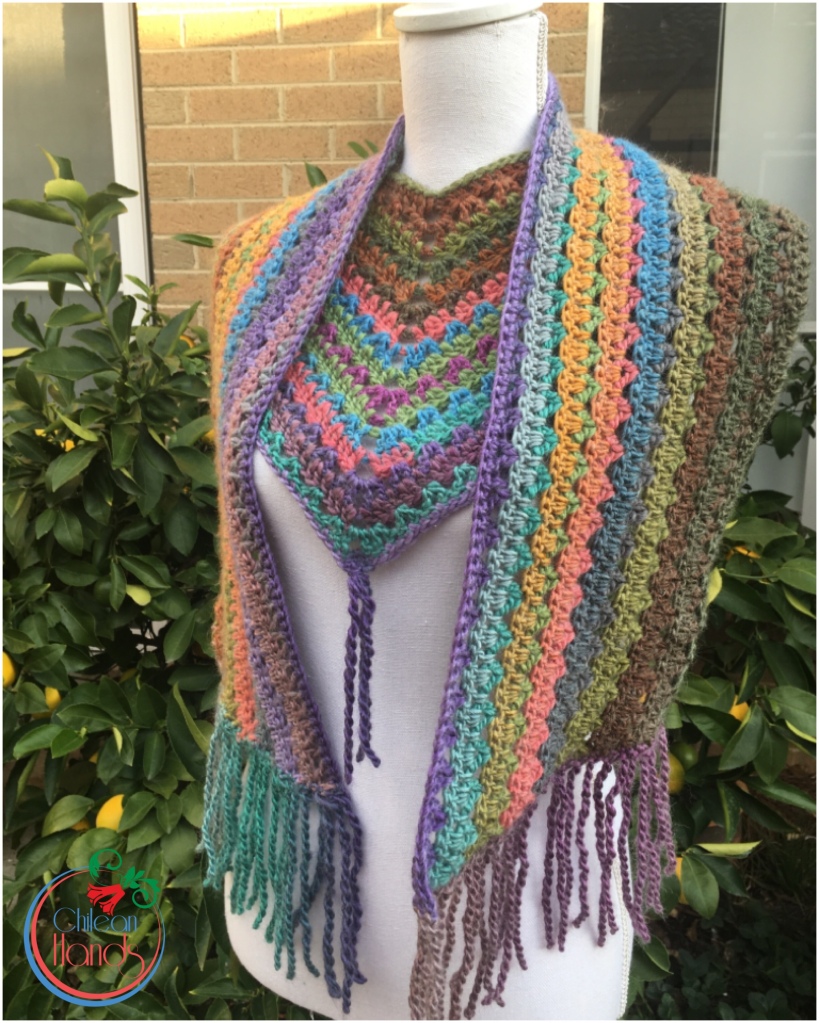
Sarah is a lovely friend and she had told me that she would get really cold at work and so I thought I will make her a pair of these fingerless mittens and while I’m at it why not a shawl as well!
This shawl had caught my eye and it would work great with the same yarns she had so generously given me. This shawl has two versions, the more triangular original version SisLove and the Half Circle Sis Love and I went for the latter. You can find this wonderful design in here and it’s FREE!
Mind you, you will use quite a bit of yarn, but it’s totally worth it.
Time went by and the shawl as well as the gloves stayed all ready to be given at home for a long time!
During COVID it was basically impossible to meet and right after people had so many things to catch up with that I left this set all nice and cozy for the time being.
I’m so thrilled to let you all know that she loved her gifts! And I’m even happier than her by giving my hand made products and knowing them so well received!
It finally got cold, after a hot uncomfortable summer I have welcomed autumn with opened arms.
Some people love summer as I love the cooler months, each to their own as a dear friend says to me; the most important thing is that cold weather invites us to knit, crochet and as a result wear those items and feel even warmer as they mean so much to us or to those we give these items to.
Since walking to work this year I decided to make myself a cute scarf using some yummy yarns I’ve been hoarding I mean protecting hahaha! I thought this specific yarn would be perfect for this project.
The pattern is written by Atty and it’s a great pattern, but on rows 1 it’s not 118 stitches but 117! This made me redo this part twice! So count wisely.
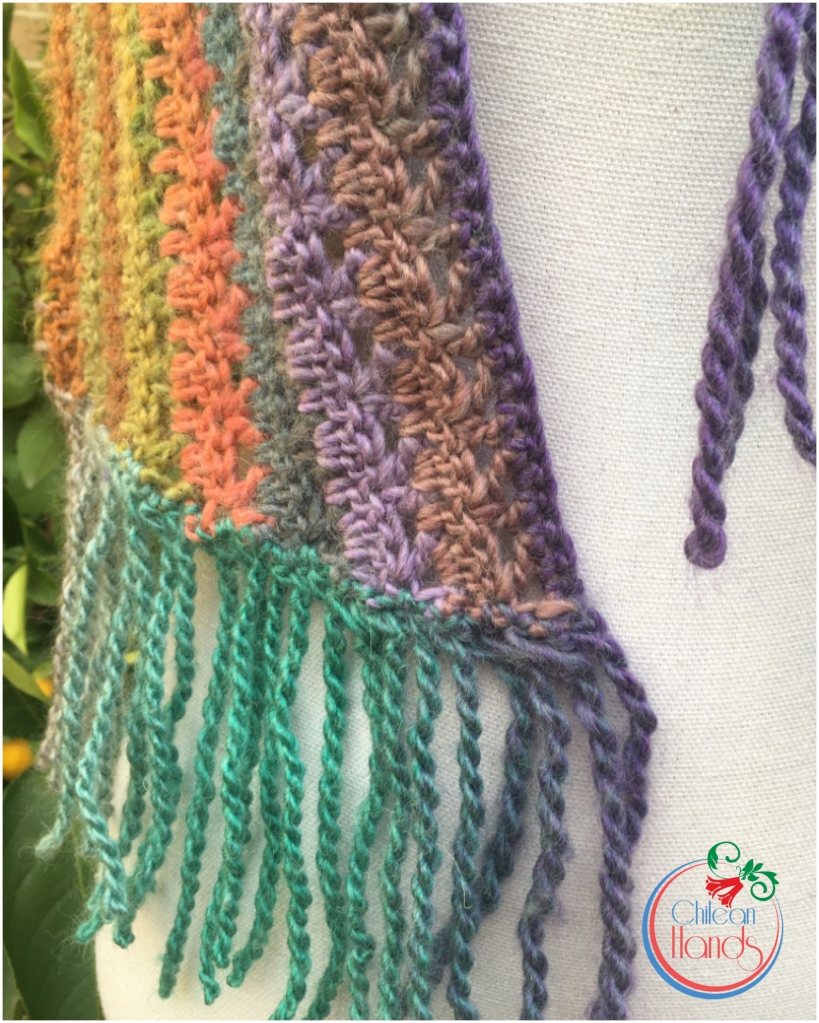
As for the yarn I used three different colour yarns and I love the result! I started with Grass mix, then fairy mix and ended with unicorn mix. Because this yarn is bulkier than the ones used in the pattern, I only did 13 rows and I had enough yarn and some left over to make all the cute fringe design as well,
The fringe… to make this you have to do the following. Sc and pull the yarn about three times over the length that you really need. For mine I did about a 30cm pull and twisted that pull 40 times, then I proceeded to sc on t very same one sc st where I pulled and started the fringe, then s sc on the next st and proceed to repeat the same as you did before…easy peacy.
I hope you. Enjoy this post as much as I did, not only because I love sharing this project with you but also because this post is the start of a new chapter of my life … more in the next post!
Have a wonderful day and do a little crafting to keep your heart happy!
Having a fatty liver means having to cut processed sugars, carbs and increase the amount of cruciferous vegetables such as broccoli, cabbage, kale, cauliflower and Brussel sprouts to name a few.
I’m really lucky that I really enjoy eating broccoli and cabbage, but I love sweets and although I am not allowed to have refined sugars as they become fat that it’s not good for my liver.
Last night I really felt like having a piece of cake! I even pictured it how it would look like and even the taste! I even dreamt about making it.
What a lovely cake!
What I live about this cake is that I didn’t have to go to the shops to grab any ingredients and I hope you don’t have to either.
Local honey to great use
APPLE CINNAMON TEA CAKE (without sugar)
Ingredients
1 cup of oats (quick or rolled)
3 cups of wholemeal flour
2 teaspoons of baking powder
3 teaspoons of cinnamon
2 tablespoons of shredded coconut (optional)
1/4 cup of coconut oil
2 eggs
10 dates
2 cups of milk or milk substitute (coconut, almond, rice or soy)
2 apples (I had pink ladies, but Granny Smith would work as well)
So yummy with a dash of local honey, and a cup of tea.
Method
Preheat the oven at 175°C and prep a mould; I used a silicone rectangular one.
Start by mixing the oats, flour, cinnamon and baking powder using a whisk. Using a blender or a Nutribullet (that’s what I used) mix the dates, eggs, milk and oil. Using a grater, grate the apples.
Make a little well in the center of your dry ingredients and add your wet mix to it, add the gated apples and using a spatula mixed all ingredients and let them sit for 5 minutes before pouring into the cake mould.
Bake for 60 minutes or until your skewer comes off clean.
We couldn’t wait any longer and sliced while still hot, we should have waited a bit longer.
Would you like a piece?
I can’t wait to hear from you and how this recipe worked for you.
It seems that whatever twist or turn I take I always come back to yarn.
I recently discovered a variety of knitting machines and although you don’t knit or crochet you still have to put together the pieces you have “cranked”.
You crochet with a. Crochet hoo, you knit with knitting needles and you “crank” when you use a knitting machine.
In the short time I’ve been playing with them I’ve made some cute creations and a few beanies.
I used the Sentro 22 pins to make this cute Gnome
There are a few machines and brands to chose from. You can either go for the better quality and of course more expensive Addi brand machines that come in Addi 46 and Addi 22 pins, or go with the Sentro brand which offers basically the same range but at lower price; Sentro has Sentro 48, Sentro 40 and Sentro 2 pins machines available.
I made this one using the Sentro 48 pins
If you are starting you might want to choose the cheaper option and see if you want to keep going, maybe go and get the more expensive ones.
One of the prettiest creations I’ve seen are made using the Tulip -icord machine. It’s a simple technique and you can also do it without a machine, but it does make it quicker.
If you want to make pretty creations like this all you need is yarn, 16 or 14 gauge wire, pens if you choose to make pens and some basics like glue, needle and also wire cutters.
*Some of the links in this page are affiliate links, if you purchase following the link I would get a small rewards but you won’t have to pay any extra*
Have fun and grab a machine! You won’t regret it 🙂
I think we all face at one time or another some kind of creative’s block and for us Cricut or silhouette users can be easily gone in 3 steps!
I love browsing for ideas and projects I can easily accomplish so it can get my creative juices flowing, if a project is a bit too hard it may not work as well “deblocking” your creative spirit, so the best is to choose a fairy simple but exiting enough project to make.
STEP 1: visit a website that will get your inspired! IN SPIRIT
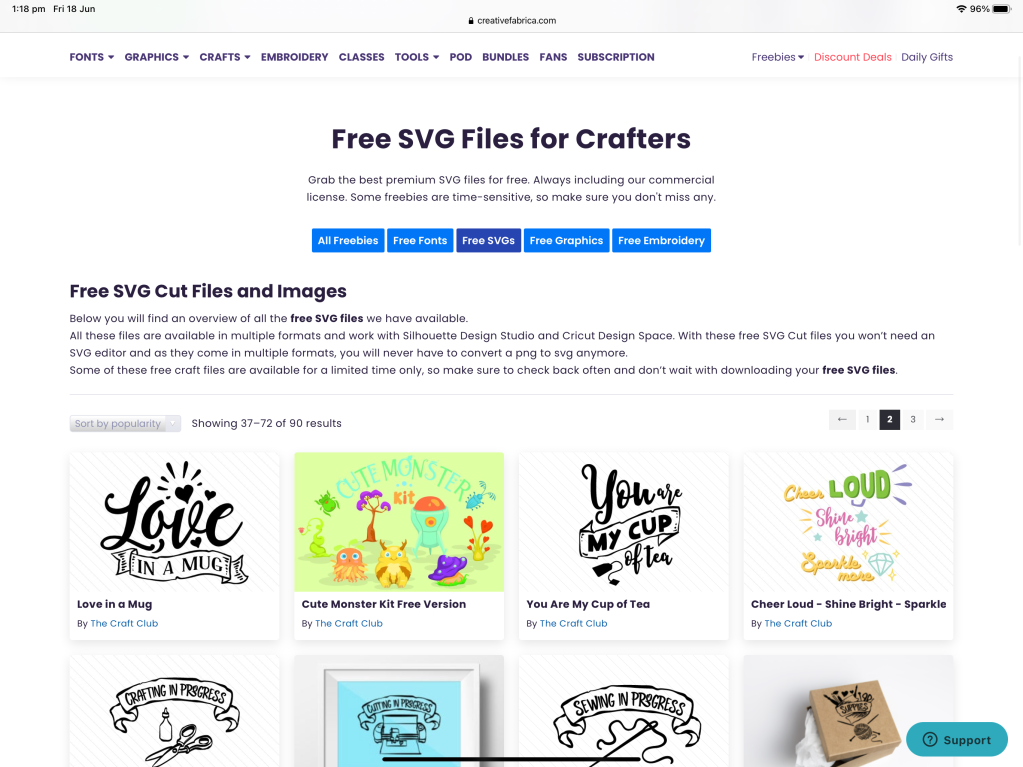
My go to is Creative Fabrica and their craft section as you can browse for phenomenal fonts, graphics, illustrations and best part is that you don’t need to have a paid membership to enjoy them. They have a section for freebies and it’s vast!
You can create a free membership with creative fabrica.
This will show you a great range of project and this is when your creative juices will start to flow!
What a range! And for FREE!
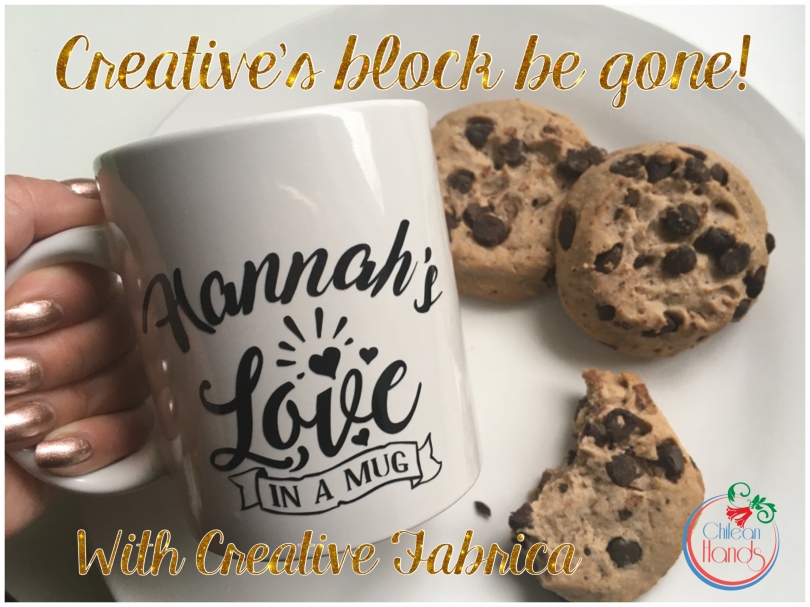
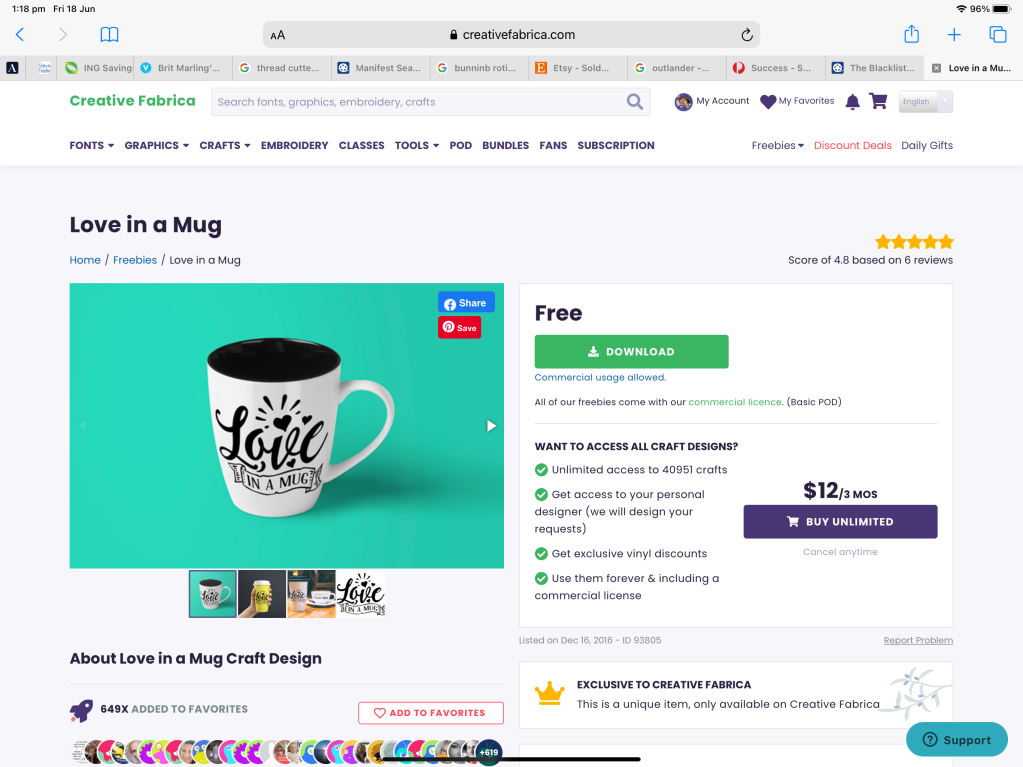
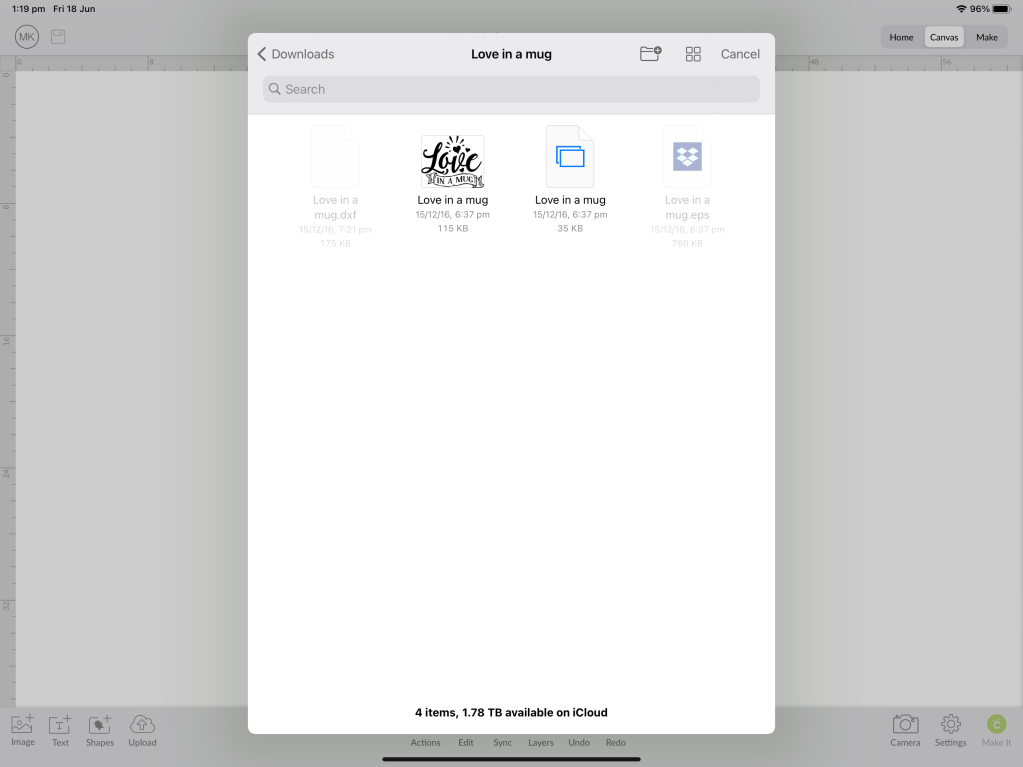
The very first one caught my eye, because I needed to personalize a mug for a friend, so when she comes over my place she can have tea in her own mug. You can download the same one following the link provided. You will need to download and open the zip file under files if using iPad like me; after that the file as a PNG or SVG will be ready to upload from Cricut Design Space
STEP 3: Open Cricut Design Space and Upload your chosen file!
Simple, right?
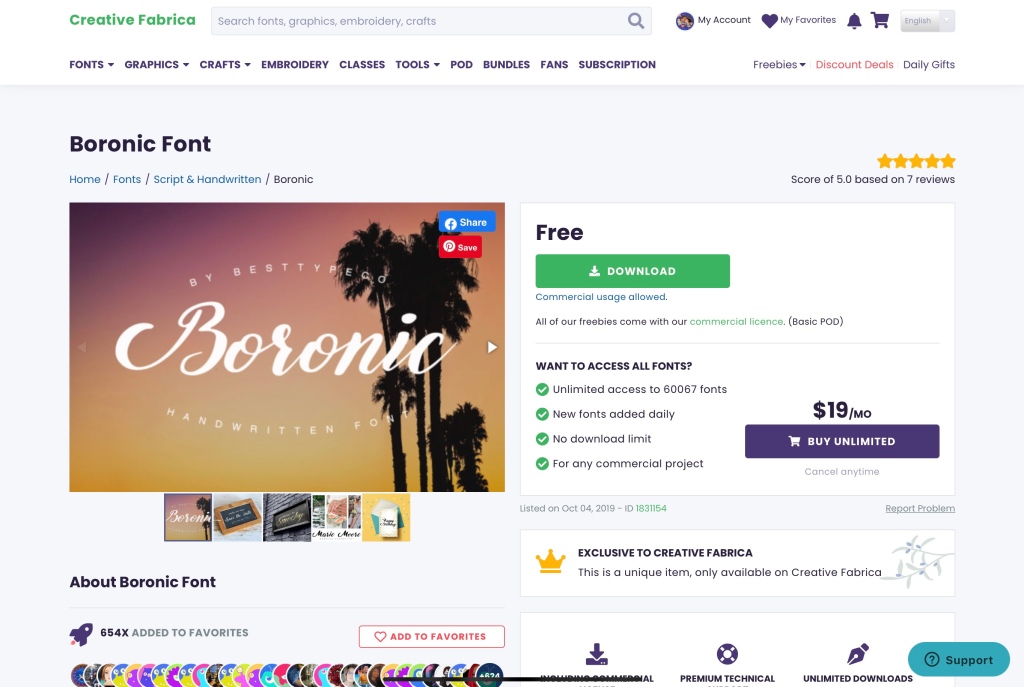
EXTRA STEP : Add a name to the design. I wanted to make this mug extra special and decided to add her name to the design and so I went to Creative Fabrica’s Free fonts and looked for one alike the one of the design. All these fonts also include commercial use! SWEEEEET!!
After you have downloaded it, go to your files and open the file so it decompress itself. I use Any Font app to download fonts to my iPad system. It’s super simple!
Back to Cricut Design Space and let’s work on our design!
Because I am using DS in iPad I can not use the curve font tool, but I use a circle from shapes and arrange the letters using it. I forgot to get a screenshot of before, but it’s easy to do with patience. Make sure you align the name to the centre of the circle and start arranging left and right to the letter from the centre, in my case it was the second N.
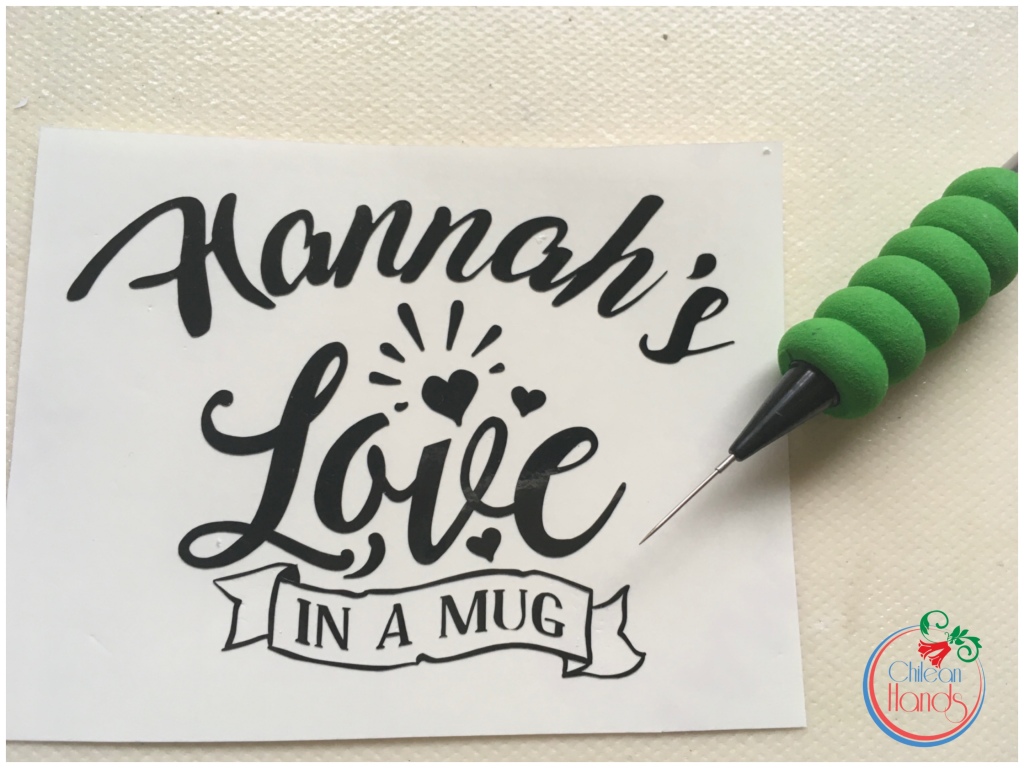
Once my design was ready to go and measured to size I used outdoor vinyl (premium vinyl setting) and cut my design. I decided to take the little bits inside the banner as they are harder to stay for long, as they are really tiny.
All weeded using my super needle/pen weeder.
Easy!… right?
Hanna’s mug is ready now and I’ll cure it for a good couple of weeks before hand- washing it.
Head to Creative Fabrica and get your creative’s juices flowing and make something pretty for yourself or someone you love.
First of all I have to admit this, I’ve never felt that I’m a “paper crafts person”, I find scrapbooking pretty, as well as cards but not satisfying enough for me to work on… and that is until I found out about paper structures.
I fell in love with them!
I first made a gingerbread house from SVG Cuts and then I discovered Dreaming Tree which is simply amazing and also has better prices than the previous site I mentioned.
What I love about Dreaming Treeis that they all have great video tutorials, so even newbies like me can follow their step by step and accomplish a nice piece. I have to admit that I am still not very happy with the results of my projects, maybe because of my choice of glue? Paper? Or just maybe because you have to be so patient! And I wasn’t so while putting the projects together.
My first 3D project
Last year, when the lockdown hit hard here in Melbourne I decided I wanted to get all the materials needed to make this pretty Gingerbread House; between Spotlight, Amazon and eBay I was able to gather all the materials, but I never got to work on it until December!
The roof comes off and you can place a battery operated LED lights which will make your house a pretty awesome Christmas decoration.
Truth to be told this structure took me hours!! Mainly because my blade was too worn for Kraft cardstock, if you have the deep blade available use that instead of your standard fine point.
This is the list of materials I used to make this wonderful project: disclosure= Some of these are affiliated links and if you purchase from it I may get a small percentage of the sale, you won’t be paying extra for it.
In the end I really enjoyed it and after I finished it I bought more files from Dreaming Tree where if you spend over $12 Australian dollars you also get a file gift! Pretty awesome, right?
What happens when you want to make a lot of these structures and have nowhere to display them? You gift them to your loved ones!
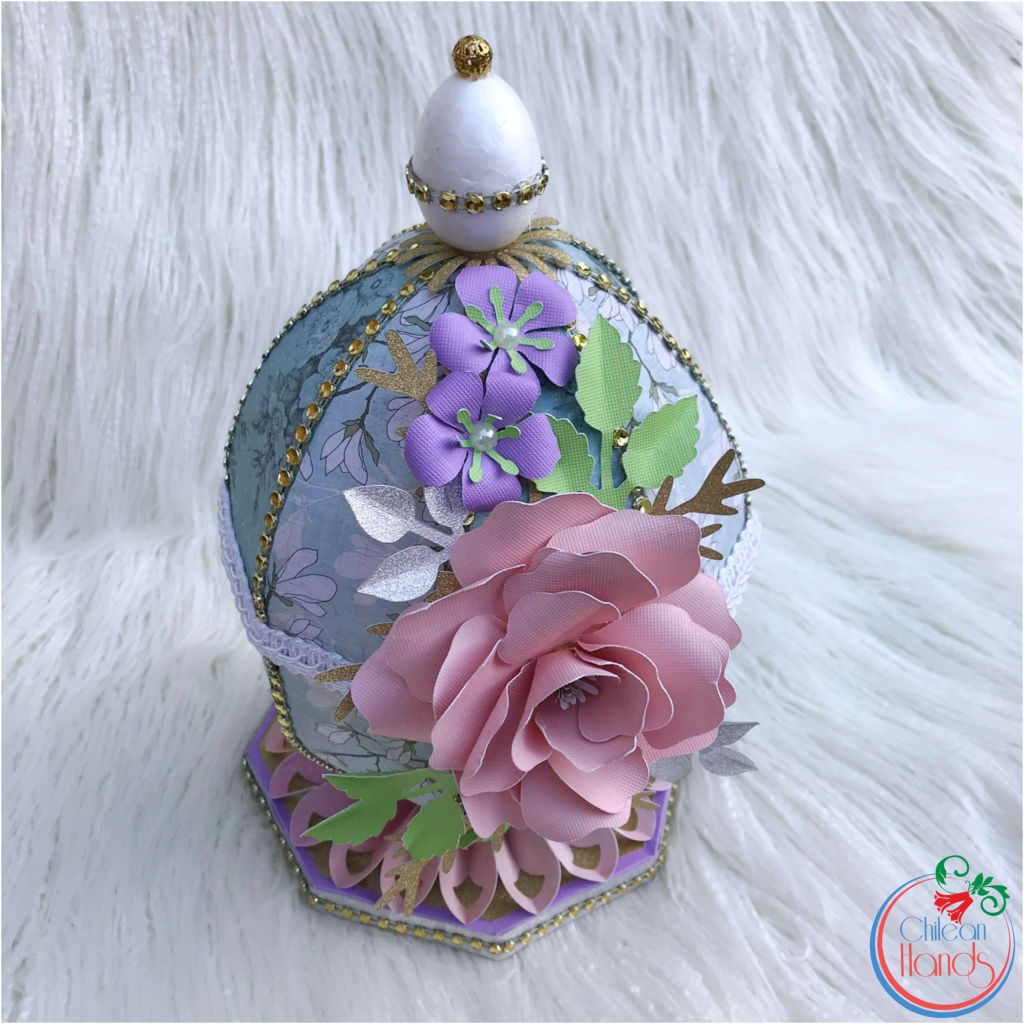
My second project was the Eggs-Quisite Guft box which I gave to my parents in law for the day after Easter… still counts, right?
This one was amazing to out together and simply elegant in all its beauty.
This one required a wider range of items, but they were fairly easy to purchase from online as well as from in store.
Here it’s my list of materials, please keep in mind I use a cutting machine to create this magnificent project:
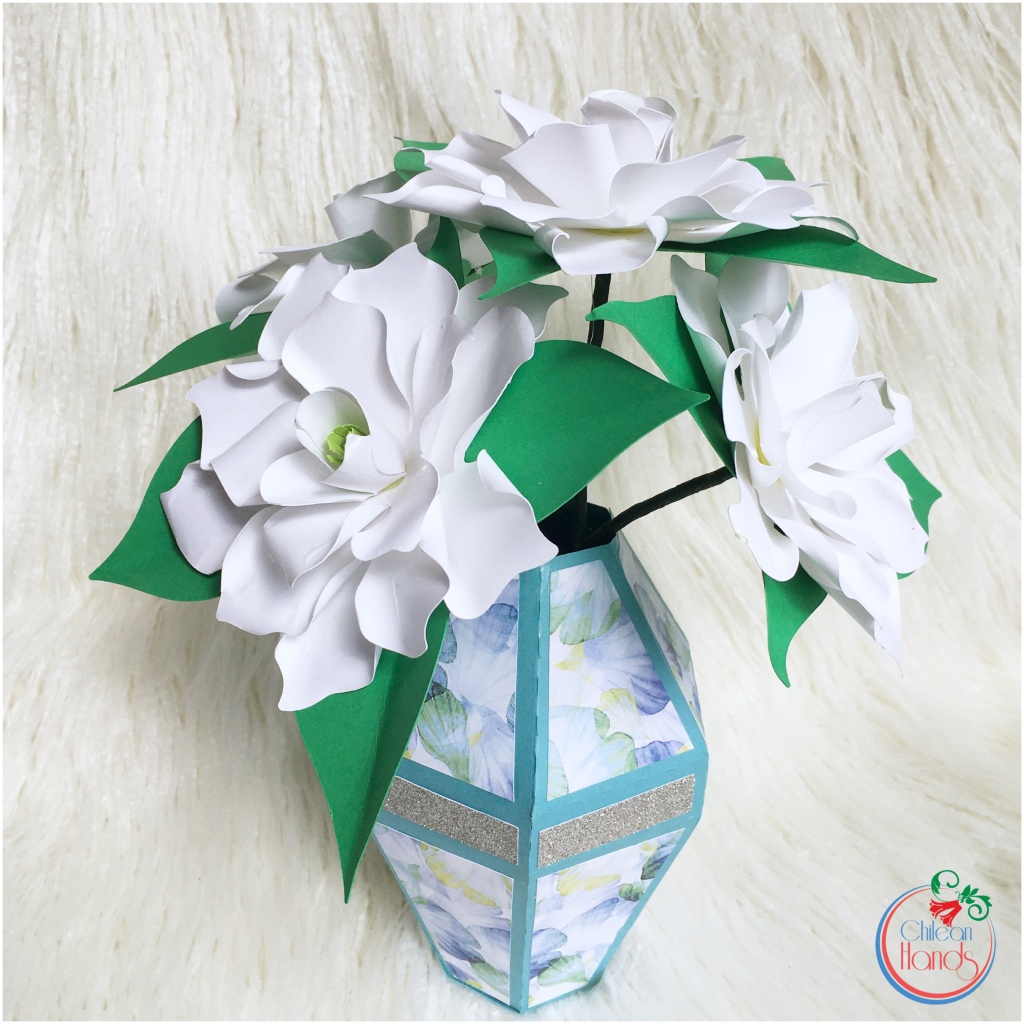
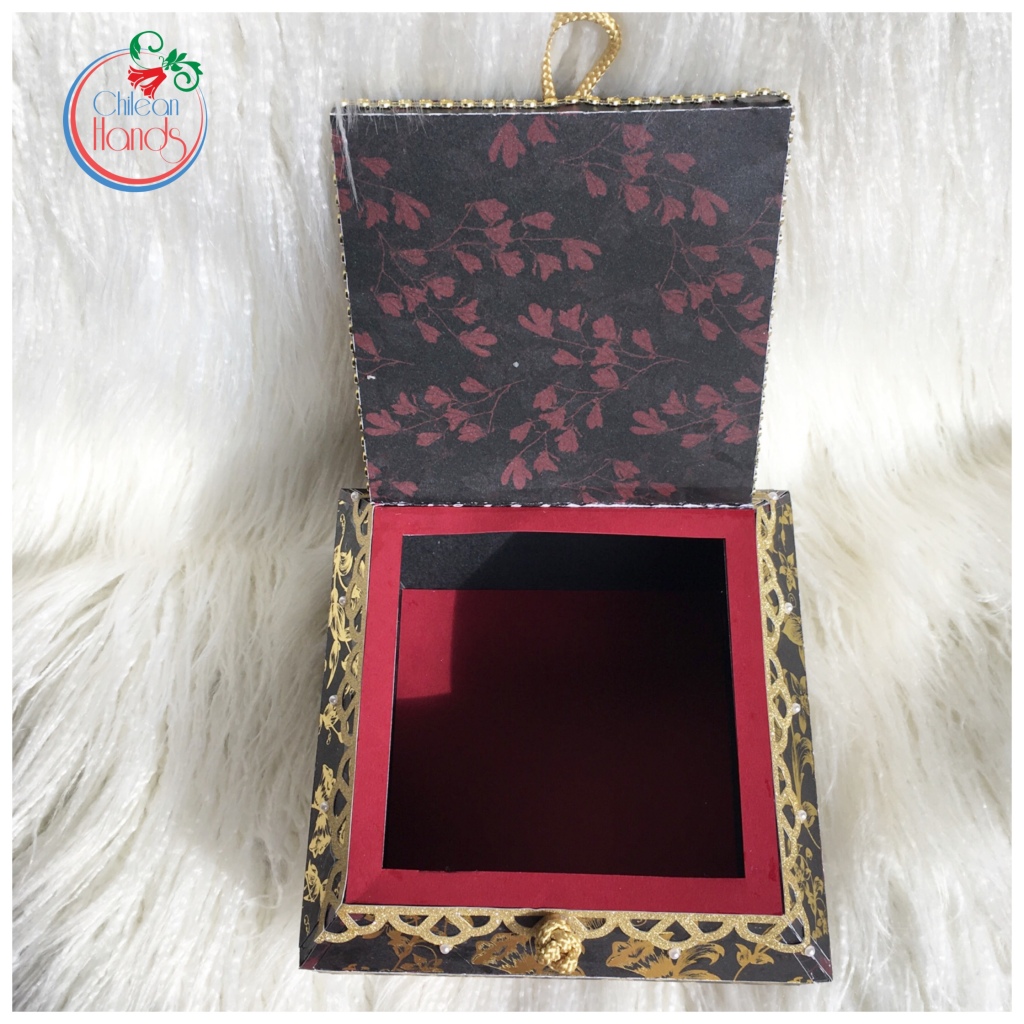
Mother’s Day was approaching and I wanted to make so many wonderful projects I wanted to have a go to, and although I wanted to make a floral arrangement i failed to remember to get a couple of extra materials to make it, so I ended up making a lovely jewelry box and a card for my mother in law.
My mom being in Chile miss out in a lot of gifts, I’m glad she doesn’t mind it, but I will be making it for her very soon.
When I give something to my mother in law I do it because; one she has been a kind of a mum to me since I’m in Australia and specially since my husband passed away which takes me to ‘two’ I do this for my husband as he is not here to celebrate his mum.
It is pretty hard to give her things as she has decided to reduce the amount of things she owns…
I like how I paired these two items from Dreaming tree. The jewelry box was part of their Mother Day bundle this year and the card is a freebie from their site as well.
On Friday Spotlight Stires sent out a $10 voucher to spend on Saturday and minimum spend was $10!
My friend Julie and I went to Spotlight and I scored two paper pads for less than the cost of 1! It was great and meant to be.
This little box of Lindt chocolates fitted just perfectly in the box and that was having a pair soft sockets from Coles supermarket.
The setting I use to cut the card stock is Medium Cardstock and for glitter cardstock, I use the glitter cardstock setting in my Cricut Maker settings. If you own a Cricut Explore Air 2, leave the knob in custom and so Design Space will lead you to choose the setting of your preference.
*This is the Francheville pad I used for my project.For a button I made a Chinese knot and loved it! it suited the oriental style of paper I chose for the project.
To bundle up this gift in the best way I also gave her a metal structure I bought from The Reject Shop and it was a Magpie, a lively Aussie bird and my in laws have their own friendly visitors and our footy team’s mascot is a magpie, we are proud Collingwood Magpies supporters as my adored husband used to be.
My gorgeous hubby wearing the Maggies‘ jumper for the 2010 grand final and we WON!This was it!
I hope you didn’t fall asleep and that you enjoyed my paper crafts journey so far.
If you would like please get social with me ☺️ or search me as “Chilean Hands”
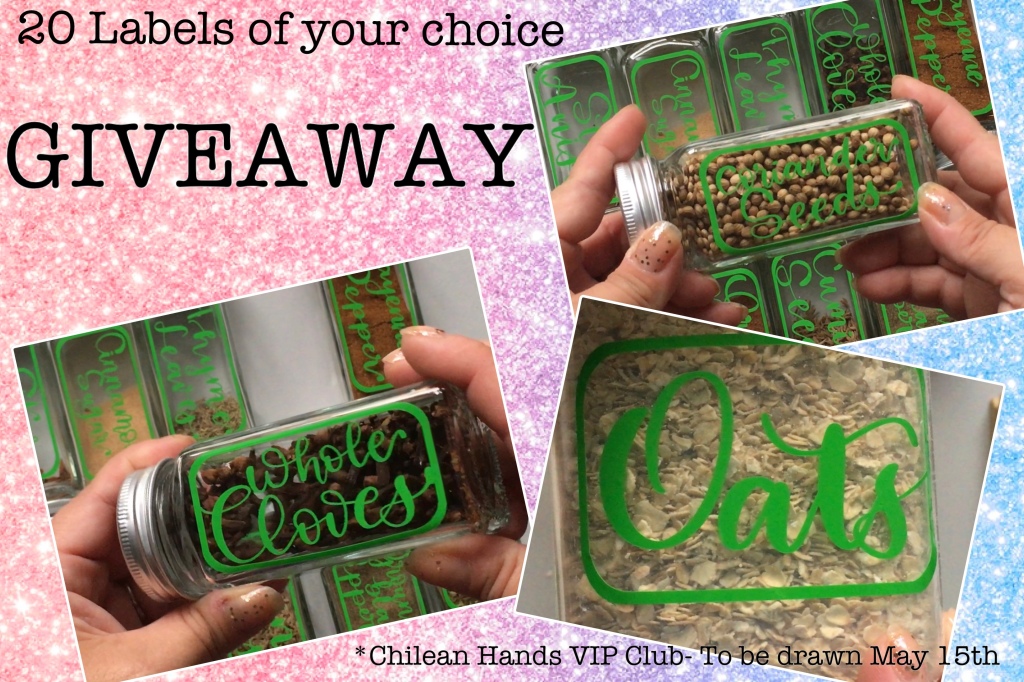
Most people will make lots of labels for their pantries once they get their cutting machines.
I bought my first machine back in 2018 and just recently 3 years later! I have just started creating my own. I think I was waiting to make something really special and unique.
It all started when I made the labels for my replacement meals and many of my pals from “the lady Shake” bought many of those labels, that gave me the little push I needed to get rolling the next batch to cover the rest of my pantry.
Click here to access my Etsy listing for Replacement meal labels.
What makes these labels unique is that I used my own hand writing, thanks to the app called Procreate where I can write and easily upload to iCloud. When I then use Cricut design space I can access iCloud and upload the file from there. Very easy and so cool!
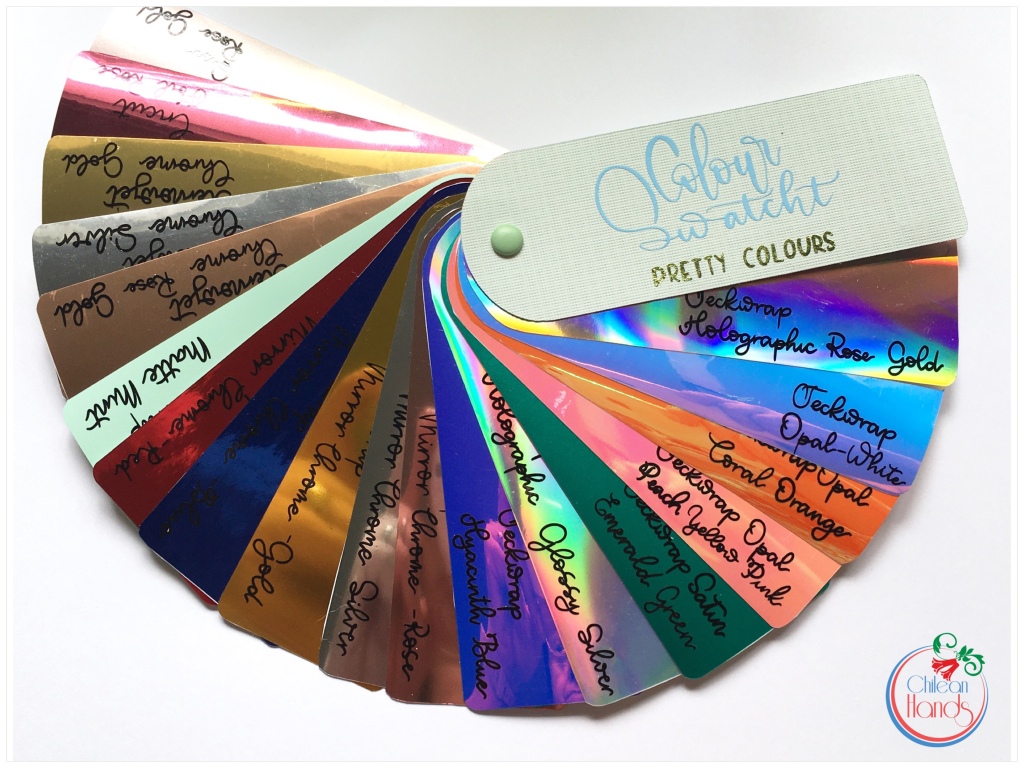
Another great thing about this is that you can choose over so many, MANY colours I have available; some are Metamark 7 and the other are Teckwrap, so there are colours for everyone’s taste!
This is my range in Metamark 7.This is my Teckwrap and Kernowjet range of colours.
In the next couple of days I will be setting up a listing for my awesome customers to purchase all what they need, but that’s not all!
To launch this new line in my store I am running a Giveaway in my VIP Facebook club and it will be drawn on May 15th.
To enter you will have to comment under this picture what is your go to spice and invite a friend to the group to be in for the giveaway! (She or he WILL HAVE TO answer the questions to become part of the group) The winner will get to choose 20 labels and her/his friend will get a 20% off to purchase labels in my Etsy store.
*The giveaway will be drawn on May 15 amongst the people who comment here
Many of you, like me have a huge range of beautiful self adhesive vinyl which keeps growing over time and if you are not careful it can get out of control.
I’m so glad Metamark 7 and my favourite Metamark 7 supplier gave me a swatch and it has made my life so much easier, I mean my Cricuting crafty life!! I can check the colours I have which helps me avoid doubling in colours and also get the just right colors when ordering online… genius!
A few months ago I started a new collection of “pretty colours” from Teckwrap Craft Australia and truth to be told it was overwhelming to have so many new ones and no swatch! So I measured my Metamark one and made my own using images on Cricut design space.
These swatches are also extremely useful to add to your sale listings instead of using pictures from websites, so your customers can see how they really look like.
To make your own swatch you will need: this list may contain affiliate links and I may get a little commission once you buy from these
Vinyl or paper colour sheets of what you want to make a swatch of
You will be able to find the project here I hope it opens for you! Because Cricut won’t let you use the project using images that have been uploaded from elsewhere, if you want to use my handwritten cover “colour swatch – pretty colours” please check this link for it. These files are PNG files and so you will have to crop when uploading to Cricut design space.
This is my own lettering 🙂
How to make your swatch:
You can make all the changes you need to personalise your swatch. Cut each piece of vinyl needed and also two for cover and back. I found that mine cut really well in medium card stock setting, but it will all depend on the vinyl you are cutting. Once you have cut everything arrange as you want! I suggest going from light to dark and on this subject you may want to check how fabric is arrange, it really is pleasing to the eye!
You can make your cover using self adhesive vinyl or HTV; I did use HTV because I really like working with Iron on on card stock instead of self adhesive, again this will be up to you.
At this point you can arrange your swatch as needed, but I highly recommend doing it as quilters arrange fabric from light to darker colours, it is really soothing to the eye.
Finally use a pretty paper fastener to keep them all together. The best part is that this gives you the freedom of adding or taking away super easily.
Oops! There is another finally! I added the names of each one of my pretty vinyls to it and I decided on using my own writing , which was quite fiddly, but it worthy. Maybe I would use clear printed stickers next time.
Since I really enjoy drinking teas and have also found some great combinations that help my liver as well as some for my stomach and to help me fall asleep I started to purchase some gorgeous teas from online Australian stores Such as Tea Hub and Tea Life. Another reason is that I want to avoid purchasing tea bags and pollute the environment with its micro plastics. After a while I have quite a few herbal teas in my possession, buy they are quite messy, specially if you don’t have the room to store all the ziploc pouches they come in.
Having a Cricut machine pushed me to organise my tea in a nicer way.
I bought 8 canisters from Kmart and designed some cite labels for the lids. Using my Apple Pencil and Procreate app I was able to crate cute unique labels for my canisters, and if you want them you can download them from this link on Dropbox.
Cricut cutting machine or any other brand of cutting machine you may have or want.
Mod Podge – Gloss Lustre
Sandpaper
Permanent self adhesive vinyl (I used white Metamark 7- setting as Premium Vinyl)
Pod Podge Super Gloss- Brillant
canisters and nice herbal teas!
I like these canisters from Kmart, they were in the cheap side but have a nice finish and over all perfect for their tea keeping purpose.
I firstly applied a thing coat of “ordinary mod Podge” making sure I also covered the edges and let them dry completely. I use the Mod Podge brush to apply the glue.
I gave them a little sanding after the glue had dried, Next is to cut your labels using your cutting machine and transfer them onto the lids. Once you have placed them you can apply a coat of this Mod Podge, which is not a glue per se.
These Modpodge will coat your project with a layer of a gloss finish similar to what you can achieve when applying époxy resin, a glassy one! I decided to use this because these canisters will live in TE bench beside the stove and for obvious reasons they will get dust and grease over time, this mod Podge will make it possible to clean the lids using a wet rag.
I made these so I can keep them inside my canisters with instructions from their original pouches and their uses. I laminates them.
Don’t forget to add the best before date to your teas/canisters. I use ordinary masking tape and markers.
It looks so much nicer!
I had to order more canisters because I have more teas and some would t fit on the small ones. I hope this inspire you to make your own!
I’ve been working for years in two different work spaces, it was time to make the fusion a reality.
This is my dining room, now nice and uncluttered.
It might not look like much to you, but it is a HUGE difference for me,for us. Not long after James passed away I started working on my Etsy and bit by bit my dining table became my workshop and besides it an ever growing stack of storage container for my charms and all the findings; as well as my stash of envelopes, pens, inks, stamps and many other bits I need for work. A few weeks ago I decided I wanted to move everything to the *treatment room. After 8 hours of hard ‘hands on’ work that left me with a very sore back and my sciatica asking for a break I was done.
Inside my Treatment Room.
As many of you know I practise many Crafts, because I love them all! Also because I sell many different things in my Etsy that require different techniques, etc. Why is this important? Well, I have to leave my “stuff” with easy access, I can’t put things away, and that’s why probably it doesn’t look like those pretty white, perfect and tidy Instagram style craft rooms, but to me this is a perfect space for my work and also full of memories and a refuge to find myself in my crafts. I should have probably published this in my almost forgotten blog! I may do that, too afterwards… Anyhow, Enzo and myself love this new craft room, “studio, my beloved treatment room.
*treatment room: My James used to do his airway (clearing) physiotherapy A.K.A. “Treatment” within the cystic fibrosis community; sitting at his desk, coughing for about 2 hours, three times a day after a ventolin nebuliser. He would call this room “the treatment room” and I would say it’s my “craft room” because I had the most (craft) items in there, he would reply that it was “treatment room” because he spent more time than me there (doing treatment). Now in his honour I call it the “treatment room”🥰.